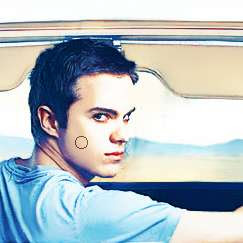
 | Preparations: We will need an image of a model, prefably a close-up on the face. I’m using Keeley Hazell for this tutorial. All rights of these resources belong to their respective owners. | |
 | Step 1 – Setting Up Background: Create a document of size 750 by 550px and save it as example.psd. Fill the background with #E6D4A7. | |
 | Step 2 – Create Strip Pattern: Create a new document with 3 by 3px, then create a new layer above Background layer. Select Pencil tool with 1px and color #000000, paint 3 dots as shown on the left. Delete the Background layer. Press Ctrl+A and go to Edit > Define Pattern. Close this document w/o saving. In example.psd, create a new layer. Select Paint Bucket tool and fill in the pattern you created. | |
 | Step 3 – Transparent Rainbow: Create a new layer above the rest. Select the Gradient tool and choose Transparent Rainbow. Drag the gradient from top-left of the document diagonally across to the bottom-right. | |
 | Step 4 – Create a Color Frame: Select the rainbow gradient layer and go to Filter > Blur > Gaussian Blur. Set the radius to 250. Create a layer mask on this layer and fill the mask with #FFFFFF. Using Soft Brush tool of size 350px and color #000000, paint center of the mask as shown on left. | |
 | Step 5 – Selecting Image Channel: Open up your model image and drag it into example.psd using Move tool. Hide the rest of layers except for the model. Go to Channels tab and choose the brightess image out of the Red, Green and Blue (for mine is Red). | |
 | Step 6 – Create Alpha Channel: Ctrl+left click on the Red channel layer to load selection of those bright areas. Click on Create New Channel to generate an alpha channel and fill it with #FFFFFF. Using Soft Brush tool of size 100px and color #FFFFFF, paint away the grey background behind the model. Note: View animation on the left. | |
 | Step 7 – Gradient on Model: Ctrl+left click on the Alpha Channel to load selection. Go to Select > Inverse. Back to Layers tab and create a new layer. Fill the selection with any color. Right-click on the layer and choose Blending Options. Activate Gradient Overlay and choose the preset Yellow, Violet, Orange, Blue. Set its angle to -45 and scale to 150. | |
 | Step 8 – Enhancing the Colors: Duplicate the model layer and go to Filter > Blur > Gaussian Blur. Set its radius to 3px. Right-click on duplicated layer and choose Blending Options. Set the mode of Gradient Overlay to Hard Light. | |
 | Step 9 – Drawing Lines: Create a new layer and draw some white vertical lines of various sizes with Pencil tool. You will need to hold down the Shift key while drawing so your lines will be straight. | |
 | Step 10 – Fading Lines: Go to Edit > Transform > Rotate and set its value to 45. Using Soft Eraser tool of size 150px, fade the two ends of the lines. Repeat Step 9 and 10 if you need more lines on your model. | |
Jumat, 07 Mei 2010
Get the Comic Style Effect on your Image


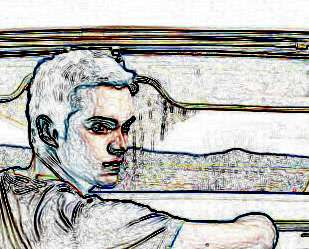
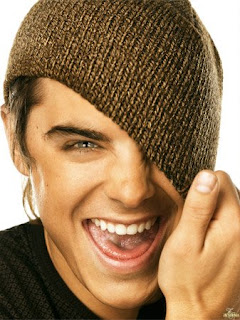
1. Open your image. Remember to flatten your image (CTRL + SHIFT + E) after you get the coloring you want.
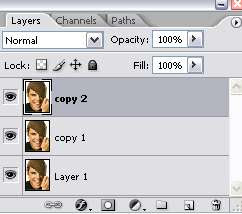
2. Duplicate your image 3 times. Here's what your layer palette should look like. Don't worry about the names. As long as you know which layer is which in this tutorial, you should be fine.
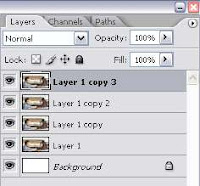
3. Select Layer 1 copy on your layer palette.
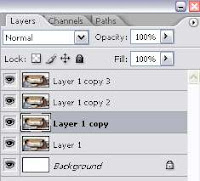
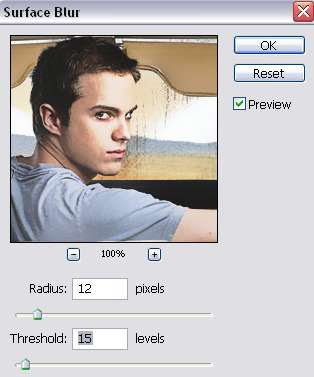
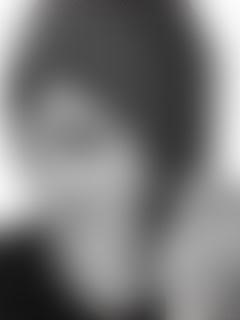
Then, go to Filter > Blur > Surface Blur. The settings I used are shown below. The goal is to smoothen the skin area. You can play around with the settings as long as you get something similar to the preview image below:
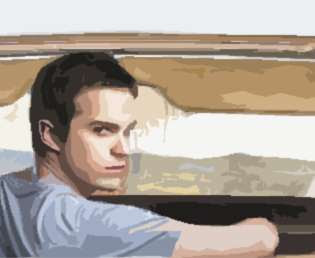
4. Next, select Layer 1 copy 2 on your layer palette. Go to Filter > Artistic > Cutout. Adjust the setting on the right until you got something similar to the preview image below. I also include the setting I used for this particular outcome on my image.

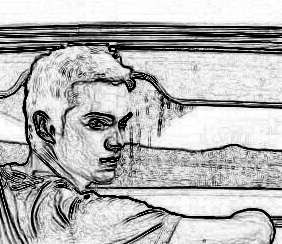
5. Then, select Layer 1 copy 3. Go to Filter > Stylize > Find Edges. You'll have something like this:
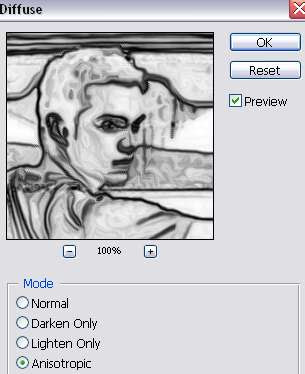
7. Still working with Layer 1 copy 3, go to Image > Adjustment > Desaturate. Then, go to Filter > Stylize > Diffuse. When the Diffuse window appear, select the Anisotropic option.
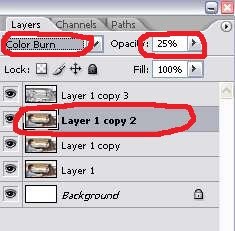
8. Now we're gonna change the layer properties. Use the settings below:
- Set Layer 1 copy 2 to Color Burn with 25% opacity.
- Set Layer 1 copy 3 to Overlay with 30% opacity.
You can always change the opacity of these two layers depending on what looks good for your image.
See examples below:
9. This last step is optional. If your image is already smooth and nice, there's no need for this final touching. If not, select the Smudge Tool (R). Choose a hard brush, set the size to 10-15 depending on your image size. Set the mode to Normal with 10% strength.

Then, find those not-so-smooth parts on your image and just smudge them away with the brush to make your image appear smoother.
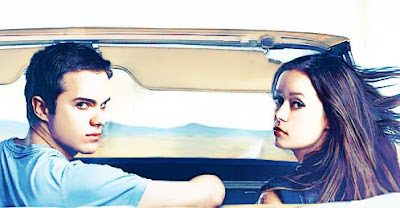
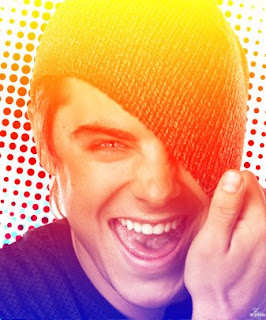
And you'll get the comic style effect you'll always wanted on your image.
Before
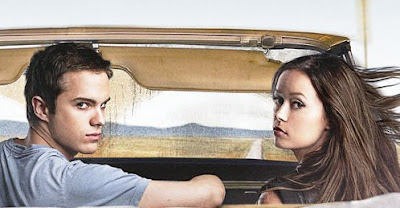
After
Cool Halftone Pattern Effect on your Photo
1. Like any other tutorials, we begin by opening the image we want to use in Photoshop. It's important to choose an image with all white background. If you don't have one, delete the colorful and distracting background out of the way, then emerge your image to a white layer.
2. Duplicate the image twice. If you don't know how to do this, just google 'How to duplicate layer in Photoshop'. I'm sure there'll be plenty of answer.
3. Here's your layer palette now.
Layer 1 --> leave it alone, in case you accidentally make any mistake later, you'll still have the original image. We'll work with 'copy 1' and 'copy 2'.
4. In your layer palette, click once on 'copy 2' layer to select it. Then, go to Image > Adjustment > Desaturate.
5. Still working with 'copy 2' layer, go to Filter > Blur > Gaussian Blur. A small Gaussian Blur window will appear, set the radius to 25. And here's what you have now.
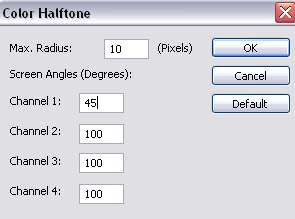
6. Next, go to Filter > Pixellate > Color Halftone. Use the following settings:
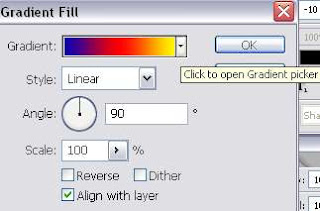
7. Then, go to Layer > New Fill Layer > Gradient. Choose the color gradient you want. I choose the one below..
8. Set the Gadient Fill 1 layer mode to Screen.
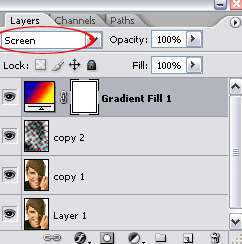
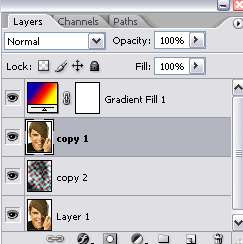
9. Move the 'copy 1' layer above 'copy 2' layer.
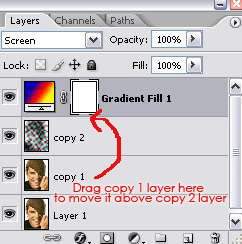
Here's your layer palette now.
10. So, where's those halftone dots now? Well, of course it's hidden underneath the 'copy 1' layer. To make it visible, I'm gonna delete/erase the background of our image. Since my background is all white, a simple way to erase it is to use the Magic Wand Tool. Select this tool from your toolbox or just click W. Then, just click on the white background area on your image to make a selection. And hit the delete key to get rid of the background.Do this several times until you've erase all the white areas.
11. To make the halftone effect more dramatic, I will reduce the size of the image (copy 1 layer) to 90%. The drag and position it slightly above and to the right of the document.
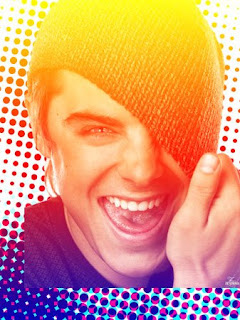
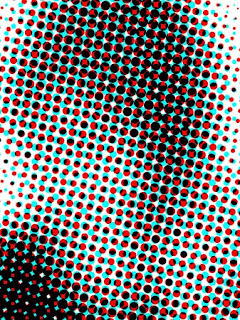
12. And crop out the area you don't want. Here's the final result:

How to create a colorful dancer with cool effects
Step 1
First of all you need to download these pictures: Smoke1, Smoke2 and Dancer
And then you need to create a new image with 800x600 (width x height). Make the background totally black.
Step 2
Now we are going to paste the dancer. Drag or copy the dancer and then paste him in the new image that we have created in photoshop.Step 3
Now as you can see we got a reflection from the dancer. We are going to delete that. Select 'Rectangular marquee tool' (M) and then draw a litte rectangular mark where you want to delete the reflection. And when you have marked the area you just click on Delete on your keyboard.
Step 4
Now we got a simple dancer in a black background. Now we are going to create some effects around the dancer. We are going to start with his hands. I am going to use Smoke1 and Smoke2 for this. Paste or drag the images into the image. We are going to start with Smoke1. When you have pasted or draged it into the image you need to right click on the smoke and then click on 'Free Transform'. Then you need to select a corner and then hold down SHIFT and then start drag so the image so it gets smaller.
Step 5
Now we need to rotate the image. Now I need you to select a corner again but now I need you to drag it so it rotates.
Step 6
Now we are going to take away all the dark background in the smoke. On the layer you need to select "Screen" to make this happen.
Step 7
Now we are done with the first smoke. And we are going to make the same, exactly the same to Smoke2. Now you need to paste or drag in Smoke2 into the image. When you have done that we need to make the smoke smaller so, right click and then click on 'Free Transform'.
And then rotate the smoke so it fits in.

And then set the new smoke layer to "Screen".

Step 8
Now we need to smooth out the corner in Smoke2. Select 'Eraser tool' (E) and then select a brush with 0% hardness.
And then start to brush out the corner line at the smoke. Like this:

Step 9
Now we are going to change the color of the smokes. First of all we are going to 'Merge down' (CTRL+E) the smokes layers, so we only got one smoke layer, so your layer area looks like this:
Step 10
Now we are going to change the color to the smokes. And as we can see one of the smokes are in a different color. So you need to goto 'Image -> Adjustments -> Hue/Saturation' (CTRL+U). When you got that windows open you need to click on "Colorize" in the right corner first and then change the color. Set, Hue: 202, Saturation: 64, Lightness: 0. Like this:
Step 11
Now we need to make the smoke layer a bit translucent. Lower the layer's 'Opacity' to 60%, like this:
Step 12
Now we are going to create a new layer (CTRL+SHIFT+N) and then select 'Pen Tool' (P) with paths marked out. Click on the blue pointers.
Then you need to click out points with the 'Pen Tool' like this:

Then you need to hold down ALT and then drag the pointers so it smoothes out.

Now you need to Right click and then click on "Stroke Path" and use the Brush and use Simulate Pressure. Don't forget to use a brush with 3px before you do this.

Now we are going to erase some lines around the leg. So it looks like a cool curve that goes around the leg. Select 'Eraser Tool'(E) and then brush out the lines you don't want so the line goes around the leg. Like this:

Now we need to make it glow a bit. Right click on the layer with the line and then click on 'Blending Tools'. Click on 'Outer glow' and then use these settings. Use white color: #FFFFFF.

Step 13
Now we are going to create some colors. So you need to create a new layer (CTRL+SHIFT+N) and then select 'Brush Tool' (B) and then select a brush at 30px and 0% hardness. First we are going to use the color blue: #00a2ff - And then we are going to paint the hands, with the some color. Like this:
And then we are going the make the sweater yellow, #fffc00 - And then you need to paint over the sweater like this (IN THE SAME LAYER):

Now we are going to color up the belt that he uses. Use a purple color: #ea00ff and then start paint over the belt. You can use a smaller brush for this. Paint like this:

Now we are going to paint the leg. Use the colors;
Blue: #0072ff
Purple: #F600ff
Turquoise: #00e4ff
Paint it like this:

Then you need to set the layer to 'Overlay' to soften the colors in.

Step 14
Now we are going to create a cool wind effect to the dancer. Duplicate the layer with the dancer on. Your layer area should look like this:
Now you need to 'Merge down'(CTRL+E) the layer to the background layer. Like this:

Then select the background layer (with the dancer merged into it) and then goto 'Filter -> Stylize -> Wind' And use Wind, from the right. Like this:

Step 15
The final step. We are going to color the layers a bit more. We are going to color the wind behind the shoes to. Create a new layer (CTRL+SHIFT+N) and then select the 'Brush Tool' (B) and then start paint. Use the same colors as in Step 12. These:Blue: #0072ff
Purple: #F600ff
Turquoise: #00e4ff
Paint these colors like this:

And then set the layer to 'Saturation' like this:

Finish
Now you are done and your result should look like this. And if you have any comments or questions, write in my guestbook.
Langganan:
Komentar (Atom)